MIT: Mastering Innovation and Design Thinking

Mastering Innovation and Design-Thinking is a short professional development program run at MIT by Blade Kotelly and Joel Schindall. Many students of MIT and other universities develop brilliant technical skills through their studies, but since they learn to work with well-defined problems, many struggle in the real world. The course developed to teach strategies and approaches that can be applied to any design problem.

Ten steps of Design

No matter what the problem is, there are some steps you can take in approaching the design. Design is an iterative process so it’s important to realize you may go through the steps multiple times and not always in a linear fashion. The ten steps of design are:

  1. Identify needs: What is the underlying problem?
  2. Information phase: What can inform us about this problem?
  3. Stakeholder phase: Who benefits from the design? How do you think about the users? What do users really want?
  4. Boundary research: What can you do in the time you have, with the resources you have access to? What are you limited by? How can you overcome limitations?
  5. Hazard analyses: What can go wrong for the user? How can we prevent user errors? How do we help users recover from errors?
  6. Specifications
  7. Creative design
  8. Conceptual design
  9. Prototype design
  10. Verification: Testing for quality and usability.

Identify Needs

One of the first steps in approaching a design problem is to challenge any underlying assumptions you may have and first attempt to understand exactly what the problem is that you are trying to solve.

A suggested technique is to employ the use of the 5-why’s iterative questioning method. You ask the question “Why?” five times. Using this method you can come closer to identifying the root cause of the problem and determine relationships between different root causes of a problem. It’s also an easy method to implement.

Design phases

Creative design conceptual design and prototype design are tightly coupled phases. Some means of approaching these are through the use of:

  • brainstorming
  • reviewing research
  • thought experiments
  • physical experiments
  • externalization of ideas
  • down selecting based on previous criteria and prototype rendering.

OLYMPUS DIGITAL CAMERA
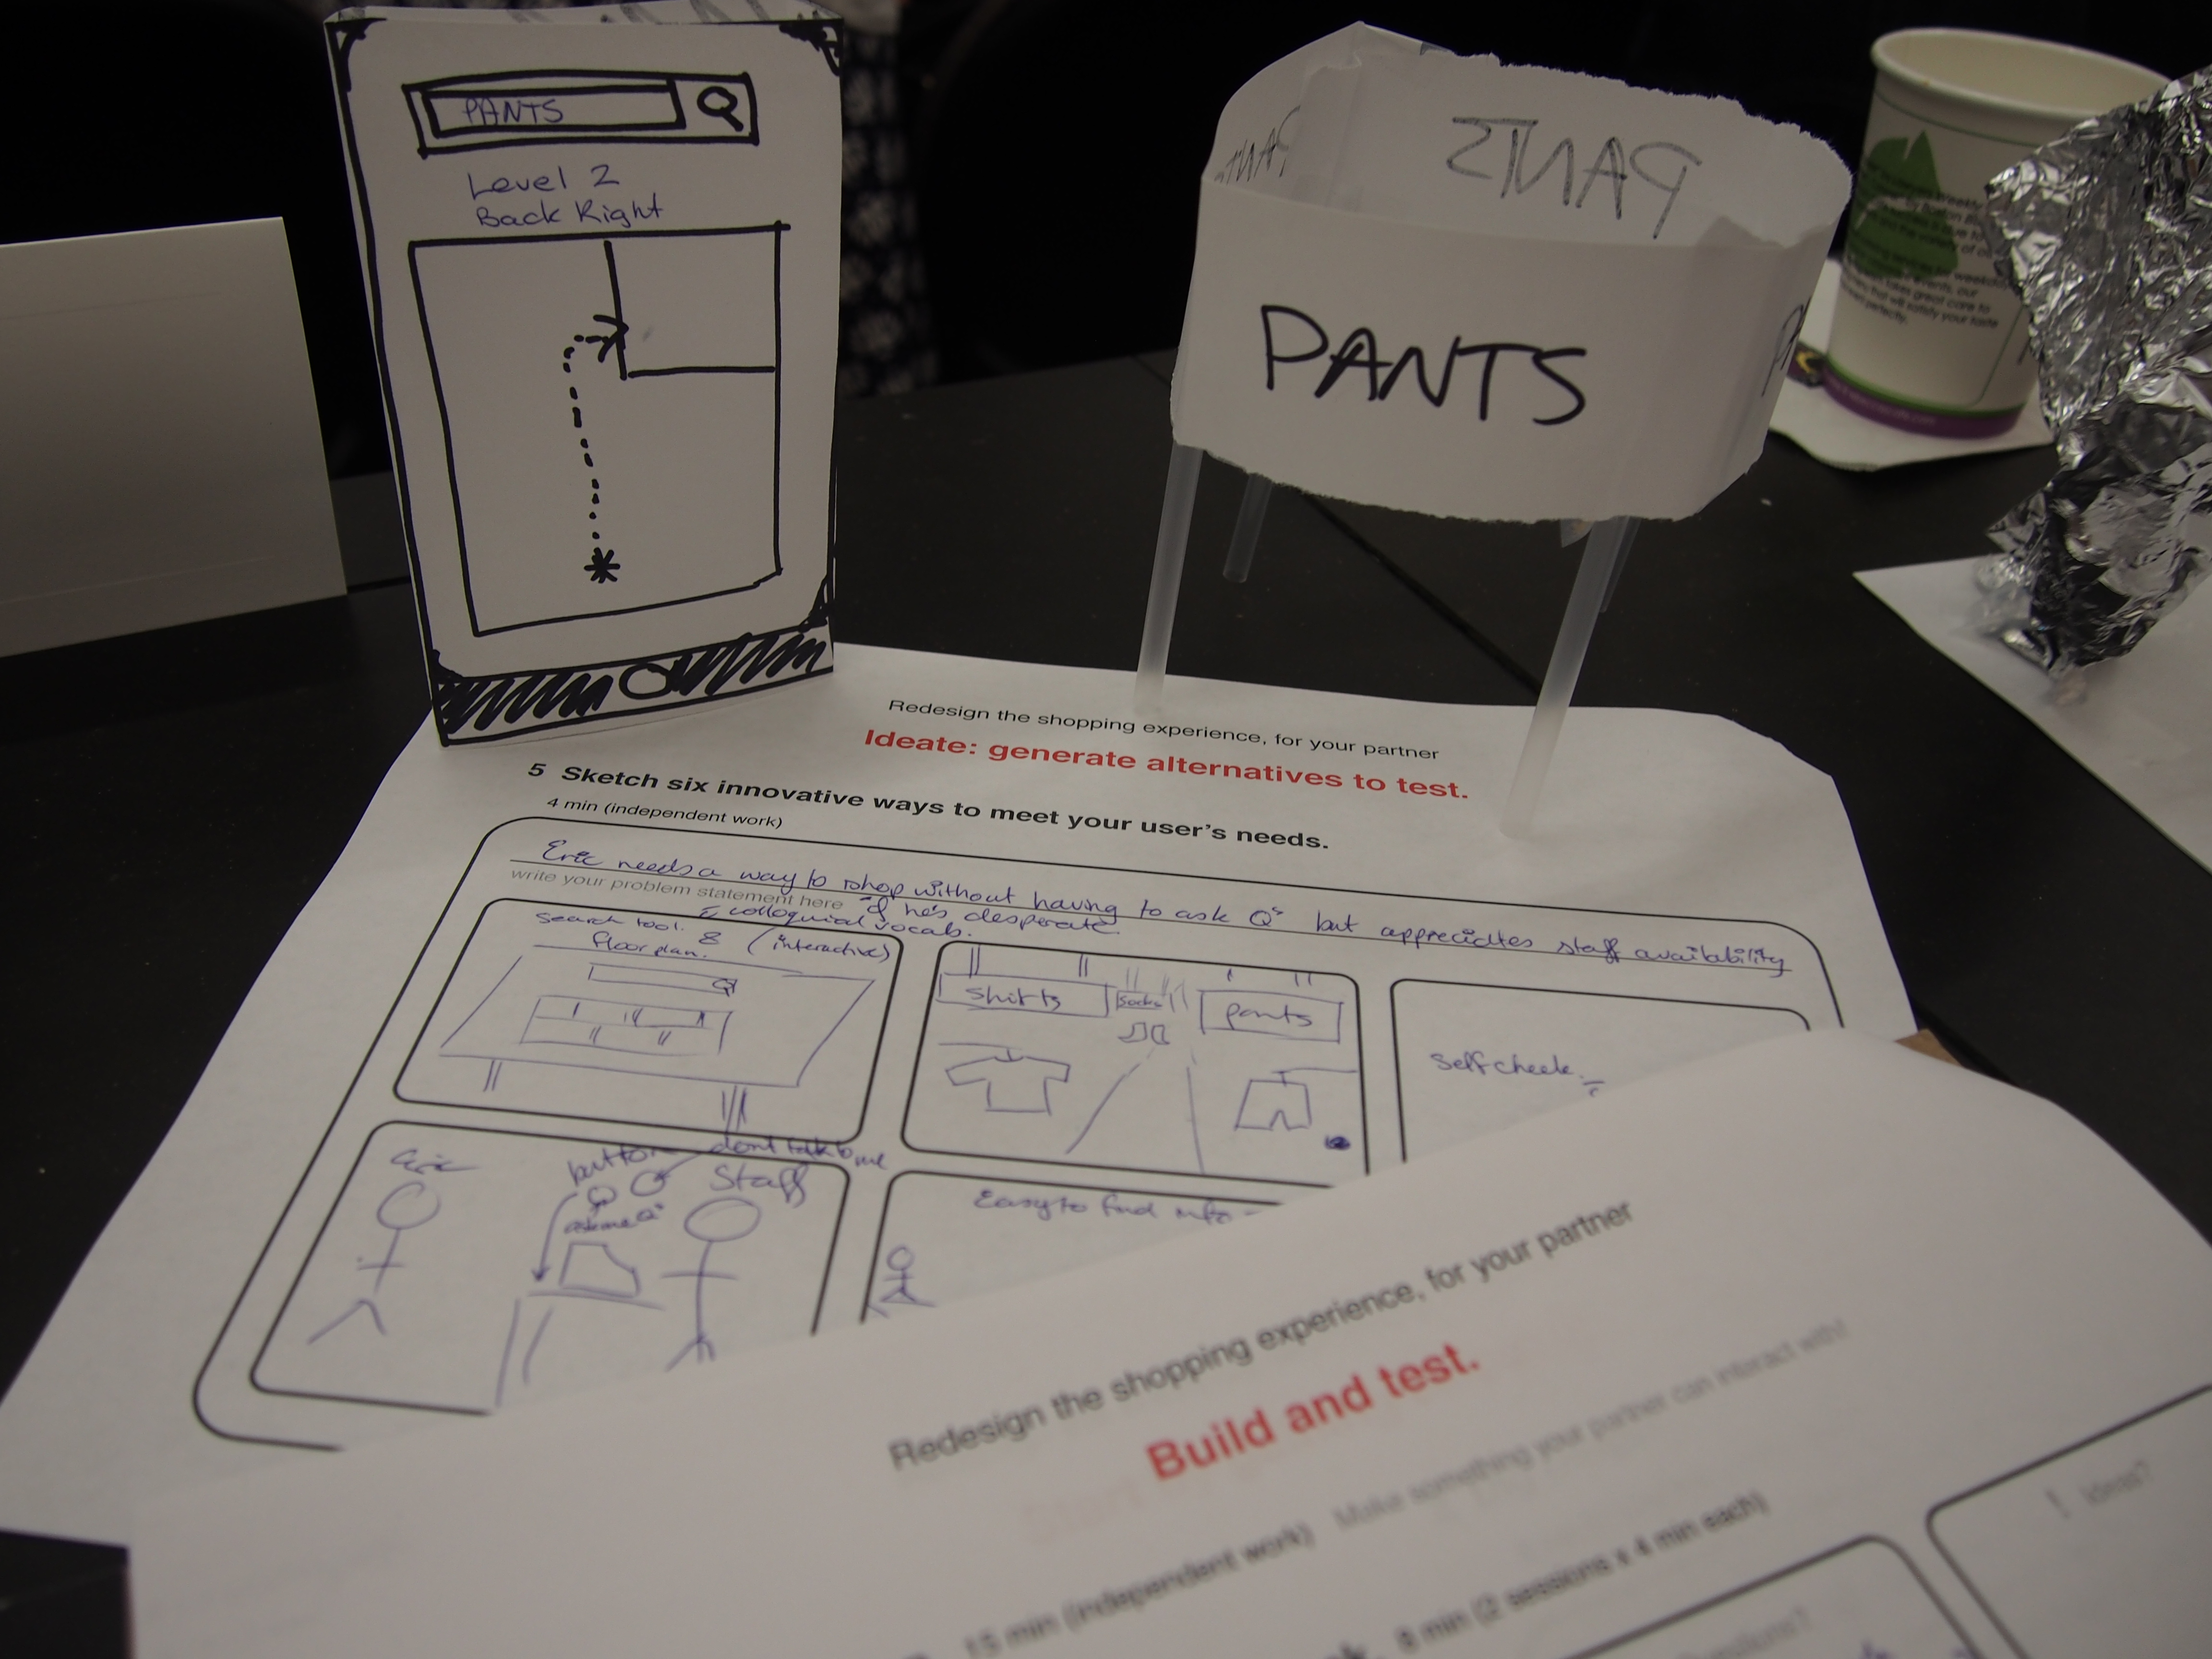
Looking at these three phases we did an exercise in class with rapid iteration and sketching of a concept. An issue with design is that if you are given too much time to think it through in detail, sometimes you become attached to the idea and are less open to constructive criticism and less likely to adapt the design as a result. By quickly pumping out a few ideas, getting feedback, refining ideas, getting feedback for a few iterations, you get the opportunity to explore various concepts without becoming attached to any of them. Through the process of sketching, discussion and reflection we can see things from different perspectives and we can feel free to explore concepts without getting bogged down in the detail. I see huge value in this, particularly as a peer activity.

Sketching is a global common language which enables idea sharing. Some benefit of sketching include the 4 R’s:

  • rapid communications
  • revisable
  • relationships between components
  • relative hierarchy within a design, to see what’s most important.

“Context is King”

No matter what the design is, it will always have good and bad aspects, as everything is contextual. The more context you can factor into your design, then better you are able to think about a design and possibly the more effective the design will be. It is crucial that designs are tightly link to user experience and purpose. If a design doesn’t meet a user needs and/or is not user intuitive then it is not a good or useful design.

An interesting exercise we completed outside of class time was a scavenger hunt. We had a list of places and items to find and the tweet back to the group using the hashtag #2015MITinnovate.

Many things we had to find were examples of good and bad design eg. A good chair design and a bad chair design. The following day we looked at and discussed each of the groups shared pictures. This is a great way to highlight differences in interests, opinions and cultures.
In one scenario a group had shared a menu that they thought was great design, for me having been to that restaurant I had found the menu terrible. It made me anxious as a customer because it gave me no indication of how to order the food. The menu was designed for locals who frequented that particular restaurant, it was a good efficient design for that target audience. The audience context has a huge impact on the perception of the menu as a good or bad design.

Stakeholder Analysis

The user of a design is only one of the stakeholders of a design, while they are arguably the most important stakeholder, it is still important to take into account who the other stakeholders are. Through a stakeholder analysis we can:

  • establish a global perspective
  • understand how to make good decisions and tradeoffs, establish priorities and communicate effectively
  • reveal hidden costs and opportunities

Presentations

Once we have developed designs, it is important to present them in order to:

  • advocate to advance and get feedback
  • inspire others
  • make an idea real

When developing a presentation you should consider your audience, present to them a story that tells them why they should care (the why is crucial, Simon Sinek made a good presentation around the why), and then summarise your design in simple language with supporting imagery where appropriate. Make sure that you retain a strong sense of purpose and don’t overwhelm people with detail. Be sure to include three major benefits to the solution you are proposing. A powerful presentation gives a clear message, engages the audience intellectually and emotionally and is conveyed with confidence (be sure to refine and rehearse your presentation).

Summary

A lot of what was covered in the course is stuff you could learn from a text book, but working through the concepts as a team, discussing examples and applying ourselves to design problems was fantastic. It gave much more context to the learning process. I also picked up some interesting and constructive teaching tools/approaches to use in the classroom too.
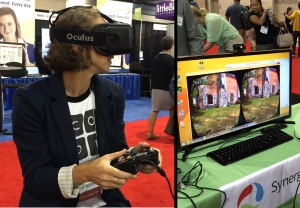
Looking back at Constructing Modern Knowledge

In addition to our project work at Constructing Modern Knowledge we had guest speakers and of course, opportunity for conversation with the workshop faculty and our peers. Some of the guest speakers had things to say that resonated more with me than others.

Leah Buechley, designer of the Arduino Lilypad had some interesting points to make. She is a big supporter of the maker movement, but has noticed that the majority of makers represented in maker magazines (she specifically focussed a study around Make: magazine) are rich. old white guys. This unfortunately sends a message that making is for a specific demographic, which is not a good message to send. All schools are made up of students from a variety of backgrounds and a mix of genders, so it’s important that we as educators are open minded and inclusive in the way we implement and promote these programs.

In setting up and promoting a makerspace, some suggested strategies to help make the space different and to enable it to succeed in any environment are:

  1. Think critically.
  2. Ask Questions. Listen.
  3. Tell lots of different stories.
  4. Do lots of different things.

Leah believes that making is a fundamental impulse, and I would agree. Making comes in many different forms, and as a community we should nurture and support this. When people are interested and engaged, amazing things can happen!

This notion that amazing things can happen was evidenced by the success we had in our project, developing energy generating shoes. In a team where no one knew anything about electronics or energy generation, we were able to use our initiative,  ask questions, collaborate and learn by doing, to attempt something we had no idea we were capable of doing. A key factor in this process though is to allow some time to work through problems. I know that as a learner I can be quite lazy and when things get challenging I like someone to help me, maybe even give me the answers, but that doesn’t help me to develop as a person.

Grit, or perseverance, is the biggest determining factor of success. As an educator it is important to refrain from jumping in to help students too soon. Learners need time to experience some frustration and struggle, to attempt a few different solutions before receiving assistance. This is something I know I struggle with an educator, as it is painful to watch people struggle. It’s important to remember though, that at the end of the day if given some* time to work on it themselves they are going to learn resilience and problem solving skills.
* I want to stress that they need some time, not loads of it, struggling for too long is detrimental to their learning.

Constructing Modern Knowledge

OLYMPUS DIGITAL CAMERA

Constructing Modern Knowledge is a hands-on workshop run in Manchester, New Hampshire by Gary Stager and Sylvia Martinez (authors of the popular book Invent to Learn). They have a supporting crew of loads of people with a background in education, edTech and making things. Some of whom include Cynthia Solomon, Eric Rosenbaum, Brian Silverman, Dan and Molly Lynn Watt, Brian Harvey and Brian Smith.

CMK is unlike any conference or workshop I have been to before, the aim is for people to engage in experiential learning by being thrown into a project and engaging problem solving and collaboration skills to develop an idea. The ideas people came up with were all kinds of crazy.

OLYMPUS DIGITAL CAMERA

Being a fan of clean energy, I chose to work on the Energy Generating Shoe. Our project team was made up of Tracie, Kurt, Mindy, Craig, Bri, Doug and I (Rob worked with us for some of the time before choosing to work on a project more in line with his interests). Our collective backgrounds included elementary and middle school teachers and an amazing librarian who has a really cool makerspace. Though we had some people with experience in science, math, programming and making, none of us had a background in electronics, which certainly set the tone for the challenge to come.

20150707_214300 copyWe started with some sketches and a MindMap. We also spoke to some of the support staff to gather some ideas. We had two main ideas for generating energy: the use of a coil and magnet and the use of piezoelectric (drum kit) transducers. We tested the coil and magnet idea but were not able to generate any energy; in addition it wasn’t a practical solution for a shoe. The piezoelectric drum kit components were small, flat and round and responded to pressure – perfect for taking advantage of the heel strike of someone walking or running.

OLYMPUS DIGITAL CAMERA

Once we discovered we could generate energy we needed to look at how to capture the energy. After discussion and more research we developed a diode bridge to allow the electricity to pass through to a capacitor, without any of the electricity flowing backwards and getting lost.

From that point we were attempting to program the arduino boards and lilypad boards to create funky led light presentations to use the generated energy. But after two days with very limited success (part of the problem was that some kits had been muddled up and we had the wrong cables and other such issues), we ran out of time and simply wired the shoe to a small switch and led lights.

OLYMPUS DIGITAL CAMERA

Honestly we felt fairly lost for the majority of the project and it was very slow going. With help from the internet and the people around us (not to mention a quick phone-a-friend to my electronics teacher friend Charlie) we managed to exceed expectations and produce a functional prototype.

Despite knowing we had tackled a hard project, we felt a little inadequate that we only had something small to show for all our time and effort, so we painted our shoes sparkly colours, we bought some gloves and gave them some bling too, including a very basic sewable set of LED lights. We blinged our presentation with sparkles and a Michael Jackson style dance performance.

The experience taught me that I can achieve more than I think when I put my mind to it, but I found it a very uncomfortable place to be. Most of the time I felt useless and wanted to run away (and some people did leave the workshop early). It’s not a learning style that I feel comfortable with. I prefer more guided instruction, but what kind of a teacher would I be if I didn’t give it a whirl and put myself in the shoes of a student.

One of the key take aways from this experience is that it’s important for students to try and figure out solutions themselves, to have challenging goals and learn how to persevere with a problem. To learn how to research and collaborate with others to achieve a goal, without receiving the direct instruction that encourages rote learning rather than understanding. While my friend Charlie has explained concepts of electricity and circuit design to me a million times before, none of it made sense until I had to construct something that used the concepts. I do feel though, that if I was to attempt something similar, I would provide mini-sessions for how to get started with things, certainly things like arduino boards.

OLYMPUS DIGITAL CAMERAIn addition to all the challenging learning experiences, I made fantastic new friends and brilliant contacts with passionate educators that will enable collaboration, to benefit learners globally.

Photos of the project are on Flickr.

ISTE: Expo Hall

Aside from all the presentations, workshops, lectures etc at ISTE there is an enormous Expo Hall. In the expo hall are over 3000 booths where people are there to present their educational resources, software, hardware etc. I mostly found the expo hall overwhelming, so I didn’t chat to heaps of people.

Google Booth

P1050917

At the Google booth they were running mini-sessions. I got the links to three of the mini presentations, but was actually only there for one.
The first session, which I missed, was Tips for Using Chrome to Support Reading.
The other session I missed was Digital Differentiation using Google Forms – I really would have liked to see this one, but actually there was a mess-up with the presenters. It was supposed to be forms, but someone turned up and started presenting about Google Expeditions.

P1050918The session I did catch was Spice up your browser with Chrome Extensions, otherwise known as Pimp your Browser.

The presenter had a ‘big five’ extensions that he would recommend, the starred ones are the ones I have since installed and would also recommend:

Move It – it allows you to create alerts to get your class to get up and move at set time intervals. We all know that blood circulation stimulates the brain. It also helps restless kiddies cope with longer lessons.
One Tab – condenses all your open tabs into one page. The page provides all your URLs listed in order, it can also be shared as a web page. This could be really useful in a class setting when you have done group brainstorming. It’s an easy way to share all the sites with the students. Also for yourself when doing research, it’s a great way to just dump all your open tab links into one place.
Google Dictionary – Adding the dictionary to your browser allows you to highlight and look up the definition of words you see in a web page. It’s a handy quick reference tool.
Google Docs Quick Create – This allows you to create a document for your google drive in a single click form the toolbar. It means you can create documents quicker with less interruption to your natural workflow ***
Bit.ly – bit.ly allows you to quickly create a shortlink for any URL. ***

They aren’t anything fancy, but they are certainly useful for improving and supporting natural workflow.

IMG_3590Microsoft Testing Center

In the expo hall was a Microsoft testing center where you were able to complete Microsoft certifications for free. While I otherwise don’t really feel a need to have any kind of Microsoft Certifications, since it was free I was keen to give it a shot. So I booked in my free exam, and 45 minutes later I came out a Microsoft Certified Educator.

I don’t really know what it means to be an MCE, but i’m sure it provides some evidence that I know at least a little bit about education and it will look good on my resume.

OculusOculus Rift

Quite some time ago, I spoke to my computer science students about a cool VR headset that was in development called the Oculus Rift. At the Expo Hall I got the opportunity to give it a whirl.

I’m not interested in gaming myself, but the technology as a concept is quite interesting. I was impressed with the overall experience, it wasn’t particularly laggy and was quite cool to be able to look around you in all directions and have the images track based on your movement. I can imagine it would be awesome for a gamer to have an immersive experience.

The only thing I found is that you can’t wear glasses at the same time. Also some people experience motions sickness. So for me using it without being able to focus properly, after three minutes I was feeling a bit woozy and disoriented. I’m certainly glad I gave it a go though!

IMG_3570ISTE Overall

My experience at ISTE was overall quite a positive one. I learned some stuff and I made some new contacts in education as well as some new friends.

I will say though that I was rather shocked and disappointed with many aspects of the conference. I felt that there was a lot of hype and a lot of hoo-ha, but actually very little depth. I regularly experienced moments of ‘this is a really cool tool you can use it your class’ without any justification for how it should be used or what the actual educational benefit was. I have resources galore but little suggestion on how, when and why they should be used in order to improve the learning experiences of the students. Shouldn’t this be a primary focus for educators? We shouldn’t be using technology for technology sake – everything we should do should be linked to the educational outcomes of our students. I feel that this concept got lost somewhere along the way.

I feel that considering it is one of the worlds biggest EdTech conferences it really needs to step up – focus more on pedagogical improvement rather than the lure of shiny new toys.

OLYMPUS DIGITAL CAMERA

ISTE: Interactive Infographics

Exploring Interactive Infographics was a short session run by Linda Nitsche and Erin Van Guilder. The aim of the session was to look at the visual and interactive communication of data through the use of infographics. Because our brains are visually wired, infographics are an easily digestable and engaging way to deliver content without overloading the brain. While there are many types of infographic, they generally fall into one of three categories:

  • Practical
  • Editorial
  • Social

anatomyWhen designing an infographic (or evaluating one) then you need to consider the following aspects:

  • the data in it
  • the sources of data and whether they reputable
  • the story that is being presented
  • the flow through the data to conclusions (this is crucial to providing understanding of the content)
  • the design style
  • color and size of the infographics as a whole, as well as individual components
  • the icons used
  • the diagrams and charts used to present the data
  • whether it is static or interactive and how that affects the overall impact or message being conveyed

These factors contribute to the overall effectiveness of the infographic. Certainly to achieve educational benefit from the use of an infographic it needs to be very well thought and planned. I think the key is ensure that you convey messages through images and graphs/charts more than text. So the text you do use needs to summarise the concepts in a very succinct manner, only conveying the important parts. Infographics are something that I personally really like. I don’t enjoy reading large blocks of text and find it difficult to focus, so I find it much easier to get a large amount of information from a well presented infographic.

Some good websites that can be used to develop infographics and interactive images are:

Thinglink – this is for interactive/clickable images
Piktochart – this is for infographics
ManyEyes – a cool aspect of this one is that you can upload data sets and it can generate some guiding questions based on the data

ISTE: Why Games? Why Now? Game Design in Schools 2014 and Beyond

Why Games? Why Now? Game Design in Schools 2014 and Beyond was the last pre-booked sessions I attended, and it was presented by Al Doyle.

Since I didn’t have much time when I was booking into sessions, I suspect I possibly didn’t read the session description properly. Based on the name, I had anticipated some discussions on when and why to use games to foster learning and how to design a game that supports the learning goals of the subject. When I got to the session however it was blatantly obvious that this was not what I was going to get. The presenter talked a great deal about playing games, demonstrated some games that he and that his students had made, none of which I saw educational value in.

We were provided with a handout that has loads of links to sites where you can create your own games, so I guess this was a positive. For me the session was otherwise irrelevant and I left one third through the presentation.

ISTE: Creative Coding with Functions

Creative Coding with Functions was run by Jean Griffin and Arta Szathmary.

The session was quite short but worthwhile. We learned a bit about functions, which I already knew, but through the explanation and resources provided I got some good ideas for ways in which I can teach the concept to my own class.

scratch1We had a look at the differences between block-based coding and text-based coding. Many teachers have found that the students (probably at the prompting of their parents) feel that block based coding is childish, it isn’t realistic and they aren’t learning anything useful. This started a useful discussion on how you can address that negative attitude. Believe it or not, block based coding is actually used right through university to teach computer science at some universities in the United States.

Logo5Block based coding looks easier, and it is, but it abstracts you from the syntax so that you can get the bigger picture. My own personal view is that if you can understand program flow and constructs, then once you move from block-based to text based, you are to learn the syntax for a concept you already understand. This is easier than learning the concept and the syntax at the same time.

appinventorI have felt for a long time that by teaching only text-based coding to students with no prior knowledge it makes the concepts much less accessible. I see real benefit in abstracting the syntax from the program flow and teaching them separately, as a progression. I also feel strongly that there should be a lower level, lead in, subject to the high level computer science subject that I teach. (I have roughly a 15% drop-out rate early in the year, based on the level of difficulty of the course, this rate has been decreasing, but is still alarming)

Through discussions with fellow computer science teachers, I did notice that I am basically the only one that takes a flying leap straight into coding with no prior knowledge. All the others I spoke to have a progression of increasing difficulty over a number of years.

In block based coding for lower year levels, such as through middle school, a recommended progression of learning is to start with Hour of Code activities as a taster, then move through to Scratch, progress on to Snap! and then engage in high level activities using MIT App Inventor.

grok-shadow-dark-blueFor people wanting to learn Python, then Grok is actually pretty cool, free and Australian!

So all in all, I found the session was good, but the most useful aspect was in the discussions I had with fellow teachers.

ISTE: Gamification and Flipped Instruction

Screen Shot 2015-06-28 at 8.37.35 amPhilip Vinogradov and Michael Matera presented a session on Gamification and Flipped Instruction.

To start the session, someone without prior experience was asked to play angry birds and have the game play displayed on the screen. We dissected the play to help gain some understanding as to what gaming can provide.

  • It was engaging for the player
  • She improved with practice
  • She was not willing to give up
  • She was frustrated along the way, but felt teacher support when it was required
  • She learned the rules as she went, adding to her knowledge as it was required. If the teacher had provided all the instructions on how to play before she started, she wouldn’t have learned as much herself
  • The game provided positive reinforcement when she did well and negative reinforcement when she did poorly
  • The game rewards mastery and mastery becomes compelling

These observations provide a case for gamification having a place in the classroom. We want students to be engaged in what they are doing, to learn along the way, to feel comfortable failing in order to improve and to feel compelled to learn more and to achieve mastery of a concept.

Having a case for gamification, both Philip and Michael have both gamified their classrooms but each in a slightly different way. Philip has gamified everything and students are required to play in order to get through the class. Michael has made it an optional extra, kind of like an extra curricular activity but it doesn’t contribute to a students grades.

No matter what gamification model you have for your classroom it is important that you have all your resources front-loaded and ready to go, they don’t all have to be visible, but they all need to be prepared. So you need to use a flipped classroom structure so that the students are able to progress at their own pace, supporting differentiated learning. As they progress through their tasks and challenges they earn points, badges and items and eventually achieve mastery in something. Once they have achieved mastery in something they can level up. As they level up, the new level provides access to the next set of resources, perhaps a new topic or higher challenges within the current topic. The students need to level up in order to gain access to the new stuff.

It is important that your game mechanics and rewards systems are well thought out and consistent. Points systems need to be directly related to the level of difficulty of the task, they need to be achievable and they need to be relevant.

Some suggestions as to how to make a gamified classroom work effectively, as well as ensuring that all the resources are pre-prepared, is to have a solid theme that has an overall mission that you need to complete. The theme needs to be supported with scenarios, characters and items that all relate to and contribute to the success of the mission. Providing the game a sense of purpose is more engaging, it’s not games for the sake of it, but working towards an achievable goal.

A major aspect of gamification is status. It’s important to use some kind of leaderboard to provide feedback and inspire friendly competition.

I was worried that the use of a leaderboard would result in students being discouraged if they start to fall towards the bottom. One way to minimise this is to use multiple ‘currencies’. By currencies I mean using a combination of experience points (XP), badges and items that students can collect. If you add in these extra dimensions (e.g. badges and items) with a  mystery value, then if a student is not at the top of the leaderboard then they still feel encouraged to participate because perhaps they have loads of cool badges or have some cool and useful items.

Another way to minimize students feeling left out and discouraged is to split the class into teams/houses/guilds (use whichever term is appropriate to your games theme). The student can feel like they are part of a collective and that together they are working their way up the team leaderboard or excelling in some way. It develops a sense of team spirit, allows for group challenges and encourages collaborative and constructive work.

I teach at senior secondary level (16-18 year old students). My students are aiming to develop skills and knowledge in order to progress to higher education (university or vocational) as well as the workplace. For these students I personally do not consider gamification to be a smart choice. I worry that if we gamify everything, students will need rewards in order to feel motivated to learn or participate, so once they hit higher education or the workplace they may not know how to engage effectively with it.

P1050900Despite the concerns I have for the high year levels, I think there is certainly a compelling case for gamifying a class. While I know I would find it daunting to set up, I think it would be fun to do it. I think it is a great way to get elementary and middle school students engaged in education.

As with any professional learning session, many questions about gamification and flipped instruction were answered, but also many questions were raised. I think it is a developing concept and one worth paying attention to and researching.

ISTE: Maximising Google Forms

Maximising Google Forms was a session run by Lisa Johnson-Bowers. I had heard about Google Forms and completed a few surveys using them, but had never had the time to actually look into how to create them and how to make use of them.

I’m not going to provide a walk through of form creation, but Lisa’s presentation does a pretty decent job of it. She was happy for me to post her slides in my blog post – so if you are keen to try Google Forms then work your way through this set of slides.

The session was well structured, and rather than just being told this is a form and thats what you can use it for, we were actually guided through the process of creating forms, customizing them and using some additional add-ons that can help us make more effective use of the form as well as the resulting data.

Some ways in which I think forms will be useful to me in my teaching:

  • Lesson review – at the start of a lesson to recap what was taught in the previous lesson, or at the end of a lesson to summarise what was covered so a student knows what areas to brush up on
  • Feedback – get student feedback on a topic, a lesson, a resource or your teaching
  • Parent communication – a form could be used to get permission for an excursion, to get feedback on their questions or concerns about their child such as in the lead up to a parent-teacher interview
  • Getting to know you – I always like to start my school year by getting to know some things about my students, so that I can connect with them on a personal level and then target my teaching towards their interests, ability and learning style (I’m also using a getting to know you style form to ask my blog readers – you – about your background and why you are engaging with my blog)
  • Class quizzes – if they are multiple choice you can even auto-grade them using an add-on called Flubaroo

There are so many applications for forms in a class setting!
I really enjoyed the session and I do still have questions, but at this point I think I am more than capable of finding the answers myself. (Actually I was also capable of figuring forms out myself, but sometimes you just need to have a block of time dedicated to a set activity before you actually engage in it)

So…now that I know a bit more about how to use Google Forms, I have created one so I can get some feedback from you, as a reader:

Please complete my Reader Survey

Screen Shot 2015-06-30 at 4.35.42 pm

ISTE Convention, Philadelphia – Reinventing Learning for the Always-On Generation

ISTE

ISTE is the International Society for Technology in Education, every year they hold a convention for people involved in education to provide a way of learning more about technologies available, ways in which to use those technologies and how they can benefit the learner. The convention is a great place to gather ideas and resources, as well as develop networks with other educators.

OLYMPUS DIGITAL CAMERADuring the convention there are workshops, discussion groups, ‘playgrounds’ for you to play with technology, expos to meet educators as well as technology developers and many other activities.

I have enrolled in several workshops, plan to attend several discussions and spend a great deal of time exploring the expo hall to see what cool stuff is out there for me to play with, that I could use in my classroom. My first workshop was Reinventing Learning for the Always-On Generation with Ryan Schaaf.

Reinventing Learning for the Always-On Generation

I attended a 3-hour workshop with Ryan Schaaf to learn about how to engage learners who are digital natives. We covered “core learning attributes of digital learners” and looked at ways to support them.

We all know that there are millions upon millions of different apps and websites that we can use to help us present information and to help students learn. Often it is hard to identify what types of tools are useful for what purpose of for what type of learner.

Throughout the session we looked at the attributes and checked out different tools that could support each attribute. I guess it’s a positive that I had used a large number of the tools already, but I had hoped to learn about more new and innovative tools.

A summary of the attributes (and two example technology tools for each) are:

  • Digital Learners prefer receiving information quickly from multiple, hyperlinked digital sources e.g. Google Earth & Google Lit Trips
  • Digital Learners prefer parallel processing and multitasking e.g. Screencasting & Evernote
  • Digital Learners prefer processing pictures, sounds, colour and video before they process text e.g. Animoto & Voicethread
  • Digital Learners prefer to network and collaborate simultaneously with many others e.g. Twitter & Instagram
  • Digital Learners are looking for instant gratification and immediate rewards, as well as simultaneously looking for deferred gratification and delayed rewards e.g. Gamification & Digital Badges
  • Many of the digital generations are transfluent – their visual-spatial skills are so highly-evolved that they have cultivated a complete physical interface between digital and real worlds e.g. Virtual Field Trips & Geocaching
  • Digital learners prefer learning that is simultaneously relevant, active, instantly useful and fun e.g. not technologies but more physical activities or scenarios

Working with teenagers and as a young teacher I do agree with these attributes, however using these technologies won’t necessarily improve their learning. I find that young people are huge consumers of technology and information but at a shallow level. We can use the technologies to hook them in, but then we need to follow through with deeper and more meaningful learning activities.

So from my perspective, I feel that I have access to a broad range of suggested technologies to use and reasons to use them, but not enough information on how to use them effectively to support meaningful learning experiences that work with the neurology of a digital native.